Create a Windows 10 Bootable USB Drive on Mac | 2021 Edition

[Notice]: We have tested the following methods on macOS Monterey Beta, Big Sur, Catalina and Mojave. Both of them worked perfectly.
Creating Windows 10 bootable USB on Mac has been a hot topic as people want to install Windows 10 on their Mac or a newly built PC. In fact, you can find a lot of tutorials from search engines but most of them require updates since Windows 10 OS has been changed dramatically in recent years. Does this matter? Yes. Those changes make Windows 10 ISO image much bigger than the first release (1507).

The latest file size of Windows 10 20H2 is 5.73 GB. And install.wim file is larger than 4GB.
WIM is an acronym for Windows Imaging; It is an imaging format that allows a single disk image to be used on multiple computer platforms. WIM is usually used to manage files like updates, drivers, and system component files without having to reboot the operating system image.
You won’t receive any error during the ISO burning process but Windows 10 installation is unable to complete. You will receive ‘ A media driver your computer needs is missing’ error at the middle of Windows 10 install.

This means you cannot directly burn this ISO to USB because FAT32 file system is only capable of storing a single file less than 4GB. And FAT32 is the only working option for creating Windows bootable USB drive.
How about NTFS? NTFS is a patent-protected file system owned by Microsoft. Apple’s macOS does not support NTFS natively so it is impossible to burn ISO to a NTFS-formatted USB on Mac. That’s the problem! And a lot of users don’t know those details and wasted hours without any success.
Simply put, you can only make a bootable Windows USB on Mac with USB formatted to FAT32.
Currently, there are two workaround to fix this issue. The first way is to split install.wim file into small pieces and copy them to USB. This can be only achieved in Terminal with text commands. Another way is to download a small size of Windows 10 ISO and burn it to USB directly on Mac, which is much simpler than using Terminal command.
The Simple Way to Create a Windows 10 Bootable USB on Mac
It is much easier to create Windows 10 bootable from macOS by using well-crafted GUI apps. It is only a few clicks away to complete the task. In fact, there are a couple of amazing apps for doing this, such as UUByte ISO Editor (most popular), Boot Camp Assistant and Terminal. We will use ISO Editor as a demo in this section because it is super easy to get started!
[Updates on July, 2021]: The latest version of UUByte ISO Editor has added support for large Windows 10 ISO. It can split install.wim by default. This means you can use any Windows 10 ISO with this app.
Step 1: Download the latest Windows 10 ISO from Microsoft website. You can visit this link to head to download page.
Step 2: Insert an USB drive on your Mac and download UUByte ISO Editor dmg file. Double click it after download and drag the app icon to Application folder.
Download link: https://www.uubyte.com/download/uubyte-iso-editor.dmg
Step 3: Eject other USB devices on Mac and open UUByte ISO Editor. You will see several menus on the main window. For creating bootable Windows 10 USB, please hit the Burn button.
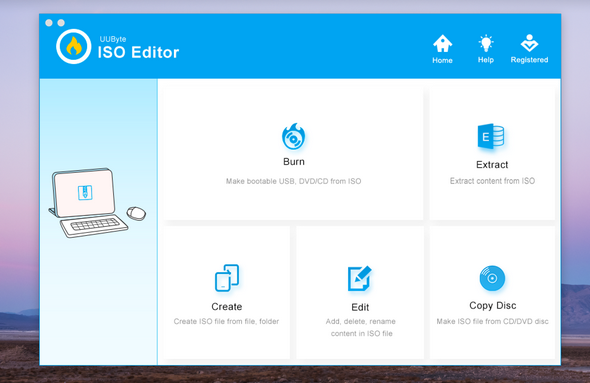
Step 4: Now add the recently downloaded Windows 10 ISO into UUByte ISO Editor. Then click the radio button of Create A Bootable USB. The USB drive will be shown in the drop-down list.

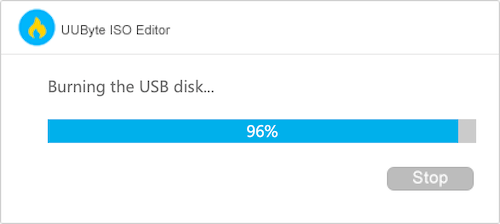
Step 5: Leave other settings to default value and click Burn button to start burning Windows 10 ISO to USB flash drive. According to our test, you should only wait 2–3 minutes and a bootable USB is ready!
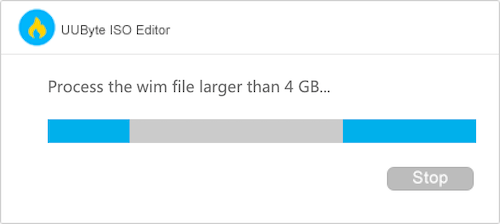
Notice: If the install.wim file is bigger than 4 GB, UUByte ISO Editor will cut it into small pieces automatically.
Step 6: Insert Windows 10 bootable USB drive into target PC or Mac and boot from it. You will see the following screen to start installing Windows 10 on that computer.

Why not creating bootable Windows 10 USB with Boot Camp? Boot Camp was used to be a great app for doing this in earlier version of macOS (Serria, High Serria and Mojave). But it has many bugs and errors on latest macOS Catalina and Big Sur. I tried several times with three different USB drives but to no avail. If you are not hurry to this task , then try Boot Camp first as it is totally free.

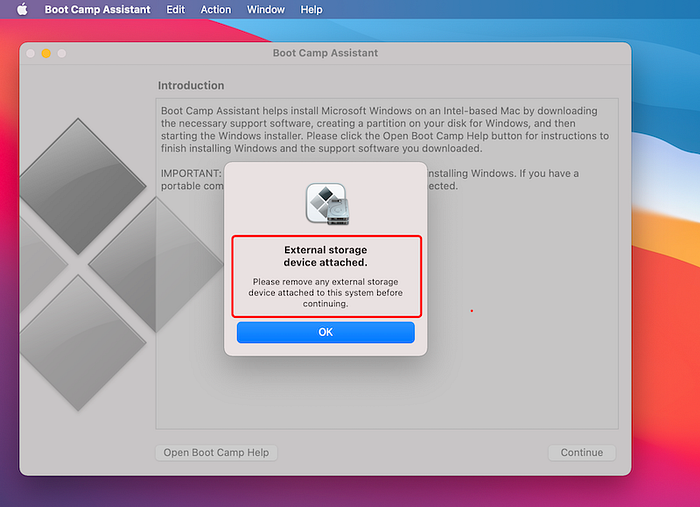
Updates: macOS Big Sur does not support making bootable Windows USB on Mac via Boot Camp any more. You will be forced to eject external USB drive when using Boot Camp Assistant app. Please don’t waste your time if you are working with Big Sur.
The Hard Way to Create a Windows 10 Bootable USB on Mac (Terminal)
The only drawback of previous method is that you have to download or get a small size of Windows 10 ISO. The rest part is quite smooth and simple with the help of UUByte ISO Editor. However, if you don’t like creating bootable Windows 10 USB in this way, then you can burn the latest Windows 10 ISO to USB no matter how large the file is. However, you need to install addition tools and type different commands to get the job done on your Mac.
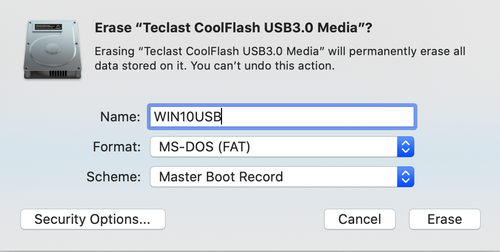
Step 1: Format USB drive to MS-DOS FAT (Master Boot Record) in Disk Utility app. Don’t forget to set a new name for that drive. In our example, it is WIN10USB.
Step 2: Find the attached USB drive name with this command:
diskutil list external.
In following example, the USB drive is /dev/disk2.

Step 3: Double click Windows 10 ISO to mount it on your Mac. You will see the mounted name (CCCOMA_X64FRE_EN-US_DV9)with this command:
ls /Volumes
Step 4: Install Homebrew package manager and wimlib (for splitting install.wim file) by pasting below commands into Terminal.
/bin/bash -c “$(curl -fsSL https://raw.githubusercontent.com/Homebrew/install/HEAD/install.sh)"
brew install wimlib
Step 5: Copy all Windows 10 installation files (exclude install) to target USB drive.
rsync -vha — exclude=sources/install.wim /Volumes/CCCOMA_X64FRE_EN-US_DV9/* /Volumes/ WIN10USB
Step 6: Now split the install.wim file into small parts (3.5GB) and copy them to USB drive.
wimlib-imagex split /Volumes/CCCOMA_X64FRE_EN-US_DV9/sources/install.wim /Volumes/ WIN10USB/sources/install.swm 3500
You should wait at least one hour if the drive is USB 2.0. For USB 3.0 drive, it could be much faster!
FAQs
- Can I format USB to exFAT and burn ISO to USB without split?
No. Although exFAT does not have 4GB file size limitation, the USB drive will not be seen a bootable device by motherboard, which only supports FAT2 and NTFS.
2. What is the latest version for direct burn?
Windows 10 21H1.
3. How to get the direct download link of old Windows 10 ISO on Mac?
Open chrome browser on your Mac and head over to official Windows 10 download page. Right click the page and choose Inspect. From the right control panel, you can change user agent to mobile device and get direct download link of old Windows 10 ISO.
4. USB is not seen by Mac
This is mostly because the USB drive is formatted to NTFS, a file system that macOS fails to detect. You need to format the USB to MS-DOS (FAT) with Disk Utility app.
5. Can not select USB from UUByte ISO Editor in Dark Mode
Please switch to Light mode in System Preferences to fix the issue.